
Inquiry On WhatsApp
+86 15810942923 
Product Classification


If you ask, "how to insulate my roof," you start by choosing the right insulation board and making sure your roof is ready. You measure, cut, and fit the boards, then seal every gap for the best results. Roof insulation keeps your home warmer in winter and cooler in summer. Want proof? Check out these numbers:
Parameter | Energy Savings / Reduction (%) |
|---|---|
Heat loss reduction through roof | 53.5 |
Overall energy savings (walls + roof) | 47.2 |
You might wonder, "how to insulate my roof" without stress. Just follow the steps, and you can do it!
Insulating your roof helps save energy. It can stop up to 53.5% of heat from escaping. This lowers your bills and helps the planet.
Good roof insulation keeps your house comfy all year. It keeps the inside temperature steady. It also stops hot or cold spots from forming.
Pick the right insulation board for your needs. You can use rigid foam, mineral wool, or fiberglass. Think about energy savings, soundproofing, or cost.
Get your roof ready by taking off old materials. Check the sheathing for damage. Put in an air control membrane to stop leaks.
Measure and cut insulation boards with care. Fit them tightly and make sure the joints do not line up. Use glue and sealants to block air and water leaks.
Leave a gap for air that is at least 4 inches wide. Keep soffit and ridge vents open. This lets air move and stops moisture from building up.
Wear safety gear like gloves, masks, and harnesses. Follow safety rules to keep yourself safe while you work.
Cover the insulation with drywall to protect it. This also helps with fire safety. Check your work to make sure the roof is tight and has good airflow.
A lot of energy leaves your house through the roof. When you add insulation, you keep more heat inside in winter. In summer, insulation stops heat from coming in. The US Energy Department says about half your heating costs are from heat lost through the roof, walls, and foundation. If you cut this heat loss in half, you could save about 25% on your energy bills. For example, if you pay $1000 a year for energy, you might save $152 by adding insulation to your roof.
Many studies say insulation can lower energy use in buildings by 35–45%. Wall insulation helps, but the roof is most important. The Environmental Protection Agency found that sealing and insulating attics can cut heating and cooling costs by about 15%. This means you pay less each month and use less energy, which is good for the planet.
Tip: More insulation means your heater and air conditioner do not have to work as hard. This saves you money and helps your equipment last longer.
Insulating your roof does more than save money. It makes your home feel better all year. Insulation keeps hot or cold air from getting in or out. This helps your rooms stay at a steady temperature. You will not have as many hot or cold spots.
Research shows that natural fiber insulation like wood fiber or straw bales can lower indoor air and wall temperatures by up to 19%. This means your house stays cooler in summer and warmer in winter. In one study, people who added roof insulation spent about 600 fewer hours each year feeling too hot or cold.
Here is a table that shows how insulation can make you more comfortable:
Upgrade Type | Cost (USD) | Discomfort Time Reduction (%) | Discomfort Time (hours/year) |
|---|---|---|---|
No insulation | 0 | 0 | 3854 |
Adding insulated roof | 260 | 6% | 3329 |
Insulated roof + door | 286 | 7% | 3200 |
You can see that even a small upgrade can help your home feel much better.
Insulating your roof also helps control moisture. Moisture can get into your attic or ceiling and cause mold or damage. Good insulation, with features like vapor relief and drainage layers, keeps water from building up where it should not.
Field studies show that insulation boards like extruded polystyrene work best when you add drainage and vapor relief layers. These features stop moisture from getting trapped. If you skip them, you might have problems like weaker insulation or roof damage over time.
Note: Always check for good drainage and vapor barriers when you insulate your roof. This keeps your home dry and your insulation working well for a long time.
There are three main types of insulation boards for your roof. Each type has its own good points. Let's look at them so you can choose the best one.
Rigid foam boards are used a lot for roof insulation. Some people call them foam board insulation. These boards come in different kinds, like expanded polystyrene (EPS), extruded polystyrene (XPS), and polyisocyanurate foam board. Each kind is a little different.
Here's a table to help you see how the main types of rigid foam compare:
Insulation Type | R-Value per Inch | Cost (approx.) | Moisture Resistance | Vapor Barrier Status |
|---|---|---|---|---|
Expanded Polystyrene (EPS) | ~4.6 | Lowest cost | Does not hold water long-term | Faced = vapor retardant |
Extruded Polystyrene (XPS) | ~5.0 | Mid-range | Absorbs more moisture over time | Semipermeable |
Polyisocyanurate (Polyiso) | ~5.8 | Higher cost | Not recyclable, facing matters | Foil-faced = vapor barrier |
These boards have high R-values for each inch. This means they keep heat in or out better. Polyisocyanurate foam board has a high R-value and a vapor barrier. Foam board insulation stays strong for many years. Most boards still work well even after a long time. The R-value can go down by up to 25% as the boards get older.
Tip: Foam board insulation works best if you seal all the joints and edges. This stops air and water from getting in.
Mineral wool is a good choice if you want to block heat and sound. This board feels thick and tough. It keeps heat out and makes your house quieter.
It does not burn easily, which helps if you live where wildfires happen.
Mineral wool boards are good for homes and big buildings.
They last a long time and do not bend or sag.
Studies show mineral wool blocks sound better than many other types. It also keeps your house warm in winter and cool in summer. If you want to save energy and have less noise, mineral wool is a smart choice.
Fiberglass insulation boards are often used in attics and roofs. They cost less than most other types. They do not burn and bugs do not like them. Fiberglass works well up to R-38. After that, adding more does not help much.
A study found that fiberglass boards with radiant barriers lower roof heat. This keeps your house cooler on hot days. You feel more comfortable and less heat comes inside.
Note: When you put in fiberglass insulation board, wear gloves and a mask. The tiny fibers can bother your skin and lungs.
Here is a list to help you remember the main things about these insulation boards:
Rigid foam: High R-value, strong, helps with moisture.
Mineral wool: Good for sound and fire, lasts a long time.
Fiberglass: Cheap, easy to get, works with radiant barriers.
Picking the right insulation board makes your roof save energy. It also makes your home feel better.
You want your roof insulation job to go smoothly. The right tools make a big difference. Here's a list of what you'll need:
Tape measure: You use this to check the size of each board and the roof area.
Utility knife or insulation saw: These help you cut boards to fit tight spaces.
Straightedge or T-square: It keeps your cuts straight and neat.
Chalk line: You mark lines for board placement.
Cordless drill or screwdriver: You secure battens or fasteners.
Caulk gun: You apply sealant to gaps and seams.
Stapler: You attach air control membranes or vapor barriers.
Building codes like the International Building Code (IBC) and International Residential Code (IRC) set minimum requirements for roof assemblies. These codes help you pick tools and materials that meet fire resistance and structural standards. Always check local rules before you start. Some areas have extra steps for safety or weather.
Tool | Purpose | Why It Matters |
|---|---|---|
Tape measure | Measure roof and boards | Accurate fit |
Utility knife/saw | Cut insulation boards | Clean edges, easy install |
Drill/screwdriver | Secure battens/fasteners | Boards stay in place |
Caulk gun | Apply sealant | Stops air and water leaks |
Tip: Use sharp blades for clean cuts. Dull tools can damage insulation and slow you down.
Roof insulation can get messy. You want to stay safe and comfortable. Many insulation materials release tiny particles. These can bother your eyes, skin, and lungs. Falls and cuts are also common risks.
Here's what you should wear:
Safety glasses or goggles: They protect your eyes from dust.
Work gloves: They keep your hands safe from sharp edges.
Long sleeves and pants: They cover your skin.
Dust mask or respirator: It keeps fibers out of your lungs.
Hard hat: It protects your head if you work under beams.
Non-slip shoes: They help you stay steady on the roof.
OSHA requires safety training for anyone handling insulation. You need to know how to use your gear and spot hazards. If you ever work near asbestos, special training and a license may be needed. Good ventilation in your work area helps you breathe easier.
Alert: Never skip safety gear. Most injuries happen when people rush or forget protection.
You want your insulation boards to stay put and block air leaks. Adhesives and sealants help you do both. Many pros use a two-part urethane adhesive. It works on polyisocyanurate, wood fiber, gypsum, concrete, and plywood. This adhesive forms a strong bond and expands to fill gaps.
Look for products that meet standards from groups like FM Global, Underwriters Laboratories, and local building codes. These certifications show the adhesive can handle wind, rain, and temperature swings. You also need a good sealant for the seams. Caulk or spray foam works well for small gaps.
Adhesive: Holds boards to the roof deck.
Sealant: Fills cracks and stops air leaks.
Spray foam: Seals bigger gaps or odd shapes.
Note: Always check the label for approved uses. Some adhesives work better on certain materials. Store them in a dry place so they last longer.
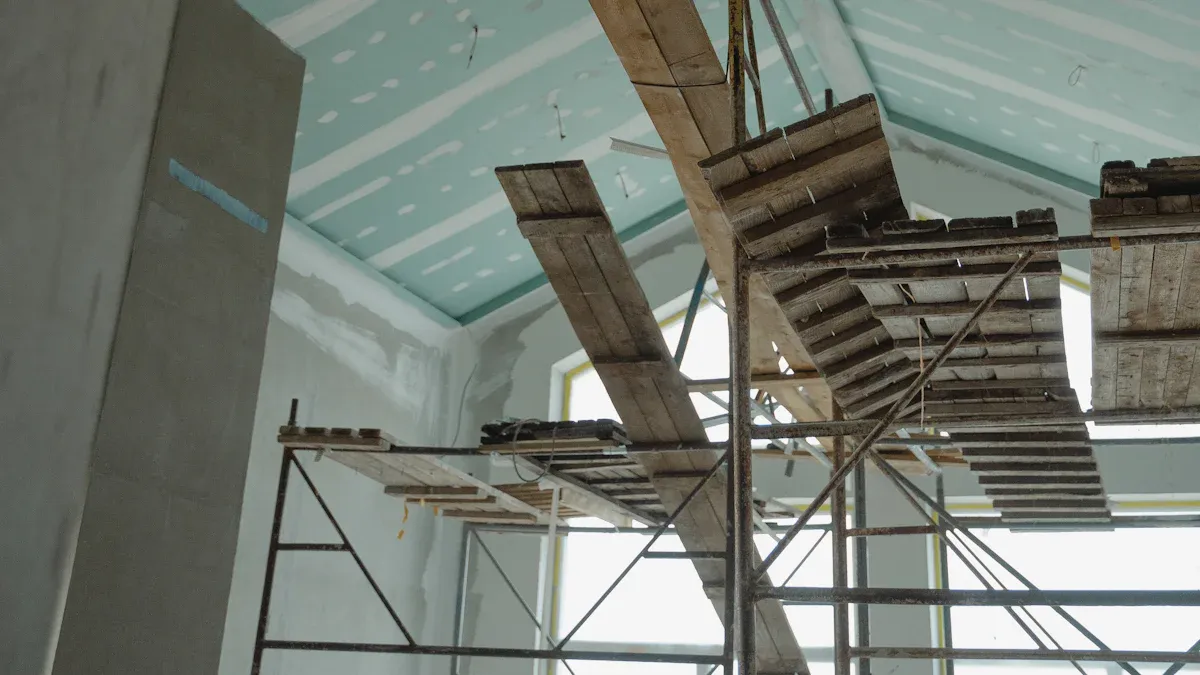
Getting your roof ready is the first big step before you start insulating roof rafters. You want a clean, safe space so your insulation boards work well and last a long time. Let's break down what you need to do.
You can't start insulating roof rafters until you clear away the old stuff. Take off any shingles, tiles, or underlayment to expose the sheathing. This step keeps your new insulation from trapping old moisture or hiding damage.
Here's a safe way to remove old roofing:
Clear debris and old materials from the roof every day. Never toss debris off the roof—carry it down safely.
Follow OSHA safety rules. Wear your safety gear and work only when the weather is dry.
Use the right tools to remove gravel or loose bits. Sweep and vacuum the surface before you tear off the old layers.
Protect the inside of your house. Cover the roof deck and anything below so water can't leak in.
Never leave the roof deck open overnight or during bad weather.
Alert: Only work when the weather is good. Wet or icy roofs are dangerous and can ruin your project.
Now you can see the sheathing. This is the base for your insulation boards. You want it dry, clean, and strong. If you skip this step, your new insulation might not last.
Use this checklist to inspect the sheathing:
Look for soft spots or signs of water damage.
Check around chimneys, vents, and skylights for cracks or gaps.
Measure moisture levels under the surface, especially near windows or flashing.
Take photos of any problem areas so you can fix them later.
If you find damage, repair it before you move on.
A careful inspection helps you spot trouble before it gets worse. Many pros use a step-by-step system to check every part of the roof. This makes sure nothing gets missed and your insulating roof rafters project starts strong.
Before you start insulating roof rafters, you need to seal up the roof. An air control membrane does this job. It sticks to the sheathing and blocks air leaks.
Tests show that using a self-adhered air barrier membrane can cut air leaks by over 90%. For example, air leakage rates can drop from as high as 12 down to just 1.4 L/s·m². That means your insulation works better and your home stays more comfortable.
Here's how you do it:
Roll out the membrane over the whole roof deck.
Press it down so it sticks tight, especially at the edges and seams.
Overlap the sheets so there are no gaps.
Seal around vents, chimneys, and other openings.
Tip: A good air control membrane makes a huge difference when you want to insulate or learn how to insulate roof rafters. It keeps drafts out and helps your insulation last longer.
Once you finish these steps, you're ready to move on to installing insulation boards. You've set the stage for a warmer, drier, and more energy-efficient home.

You want your insulation board to fit snugly. Start by measuring each section of your roof. Write down the length and width for every spot you plan to cover. Use a tape measure for accuracy. Mark the measurements on the insulation board before you cut.
Cutting is easy if you use a sharp utility knife or a saw made for insulation. Place a straightedge along your line and score the board. Snap it cleanly. Double-check the fit before you move on. If you see gaps, trim the board until it fits tight.
Here's why careful measuring and cutting matter:
The thickness of your insulation board affects how well your roof keeps heat in or out. Thicker boards mean higher R-value and better energy savings.
When you layer boards and offset the joints, you stop heat from sneaking through cracks. This helps you avoid cold spots and condensation.
Boards that touch at the edges keep air from leaking in. Air leaks make your insulation less effective.
Cover every inch. Gaps let heat escape and waste energy.
Secure boards so they do not move. This keeps your insulating roof rafters project strong for years.
Keep water out. Wet insulation does not work. Make sure your boards stay dry and sealed.
Tip: Always mark framing locations on the boards. This helps you line up fasteners and battens later.
Once you cut the insulation board, you need to fit it into place. Press each board against the roof sheathing. Make sure the edges touch. If you see a gap, adjust the board or cut a new one.
You want to install insulation in more than one layer. Stagger the seams so the joints do not line up. This is called offsetting the joints. It stops heat from slipping through the cracks. Offset joints also make your insulating roof rafters project stronger.
Here's a quick guide:
Lay the first layer of insulation board flat.
Place the next layer so the seams do not match the first layer.
Keep going until you reach the thickness you want.
This method reduces thermal bridging. It keeps your roof warmer in winter and cooler in summer. Studies show that layering and offsetting joints can cut heat loss and lower condensation risk.
You want your insulation board to stay put. Use construction adhesive to stick each board to the roof deck. Apply the adhesive in a zigzag pattern for a strong hold. Press the board down firmly.
For extra security, use wood battens or mechanical fasteners. These hold the boards tight while the adhesive dries. If you install foam board insulation, adhesive helps fill small gaps and keeps the boards from shifting.
Here's a table showing how different installation methods affect your roof's temperature:
Installation Technique | Peak Internal Surface Temperature Reduction (°C) | Overheating Intensity Reduction (%) |
|---|---|---|
Wet method (adhesive) | Baseline (reference for comparison) | Baseline |
Dry method with 5 mm air cavity | ~7.10 | N/A |
Dry method with 20 mm air cavity | ~8.70 | N/A |
Dry method with ventilated 20 mm air cavity | ~9.75 | 54 |
You can see that using a dry method with a ventilated air gap gives you the best results. It keeps your roof cooler and reduces overheating by more than half.
Note: Always check that your boards are level and tight before the adhesive sets. This makes your insulating roof rafters project last longer.
After you fit and secure the insulation board, you need to seal every gap. Use spray foam or caulk for small cracks. For bigger spaces, cut thin strips of insulation board and press them in.
Sealing gaps is key for energy savings. Air leaks can ruin your hard work. When you seal joints and seams, you stop heat from escaping and keep your home comfortable. Many pros use blower door tests or thermal cameras to check for leaks. These tools show you where air sneaks in so you can fix it.
Airtight sealing also keeps moisture out. Wet insulation loses its power to insulate. When you finish sealing, your insulating roof rafters will work better and last longer.
Tip: Run your hand along the seams. If you feel a draft, add more sealant. A tight seal means better comfort and lower bills.
You might think sealing up your roof tight is the best way to keep your home cozy. But your insulation needs to breathe, too. Leaving a ventilation gap is one of the most important steps when you install insulation boards. This gap lets air move under your roof, which keeps your insulation dry and your attic healthy.
When you block airflow, moisture can build up. That leads to mold, rot, and even damage to your roof. You want to avoid that! Experts say you should always check that soffit and ridge vents stay open. These vents let fresh air in at the bottom and push hot, damp air out at the top. If you cover them, your attic can get stuffy and wet.
How big should your ventilation gap be? Many pros recommend at least 4 inches between the insulation board and the roof deck. This is twice as much as some building codes require. A bigger gap means better airflow. It helps keep your attic cool in summer and dry in winter. For flat roofs, you want a vented area that matches a 1/150 ratio of the roof space. This keeps air moving and stops moisture from getting trapped.
Here's a quick guide to help you remember:
Ventilation Feature | Minimum Size/Ratio | Why It Matters |
|---|---|---|
Ventilation gap | 4 inches | Keeps airflow strong |
Soffit and ridge vents | Unblocked | Lets air in and out |
Flat roof vented ratio | 1/150 | Maintains balanced ventilation |
You also want to leave a small gap along the ridge of your roof. Hot air rises and escapes here, which cools your attic and protects your insulation. If you skip this step, heat can build up and make your home less comfortable.
Tip: Always double-check that nothing blocks your vents after you install insulation. Good airflow means your roof lasts longer and your home stays dry.
When you plan for a ventilation gap, you help your insulation do its job. Your attic stays fresh, your roof stays strong, and you avoid costly repairs down the road.
You have finished installing your insulation boards. Now, you need to cover them to protect your work and make your space look great. Drywall is the most common choice. It gives your ceiling a smooth, clean finish. You can paint it or add texture later.
Here's how you do it:
Measure each section of your ceiling.
Cut the drywall sheets to fit.
Lift each sheet and screw it into the framing.
Tape and mud the seams for a seamless look.
Drywall acts as a barrier. It keeps the insulation in place and helps stop air leaks. When you use drywall, you also add a layer of fire protection. This step makes your roof insulation last longer and keeps your home safer.
Tip: Use a drywall lift if you work alone. It helps you hold the sheets steady while you fasten them.
Sometimes, you want even better results. You can combine different insulation types or add special layers. This is called a hybrid system. For example, you might use rigid foam boards plus a layer of mineral wool. Some people add a reflective surface, like aluminum foil, under the roof. This combo can cut heat flow by up to 88%. It keeps your attic cooler and your energy bills lower.
Hybrid systems work well in tough climates. They let your roof breathe and dry out if moisture sneaks in. Permeable insulation, like fiberglass or open-cell foam, helps air move. This stops mold and rot. You avoid vapor traps, which can slow drying and hurt durability.
Here's a quick table to show how hybrid systems help:
Hybrid Feature | Benefit |
|---|---|
Reflective surface | Blocks heat, boosts comfort |
Permeable insulation | Lets roof dry, stops mold |
Extra thickness | More comfort, less heat loss |
Note: You get the best results when you mix materials that work together. Always check your local building codes before you start.
You are almost done! Before you call it finished, take time for a final inspection. Walk through your attic or top floor. Look for gaps, loose boards, or missed spots. Check that all vents stay open and nothing blocks airflow. Good ventilation keeps your roof dry and strong.
Use your hand to feel for drafts along seams. If you find any, seal them up. Make sure the drywall sits tight and smooth. If you used a hybrid system, check that each layer fits well. You want every part to work together.
Some pros use special tools, like moisture meters or thermal cameras. These tools spot hidden problems. You can also use a flashlight to check dark corners.
✅ Checklist:
All insulation boards fit tight
No gaps or cracks
Vents stay open
Drywall covers all insulation
No drafts or cold spots
When you finish these steps, your roof will keep your home comfortable for years. You will save money and avoid costly repairs. Great job!
You want to stay safe while working on your roof. The right gear protects you from injuries and health problems. Always wear a hard hat, safety glasses, gloves, and a dust mask. These items keep your head, eyes, hands, and lungs safe from harm.
Roof insulation can expose you to dust and tiny fibers. Fiberglass can irritate your skin and eyes. Spray foam and urea-formaldehyde foam can cause breathing problems. Asbestos insulation is very dangerous and needs special handling. You should never touch it without professional help.
Here's a quick checklist for your gear:
Hard hat for head protection
Safety glasses or goggles for your eyes
Work gloves for your hands
Dust mask or respirator for your lungs
Long sleeves and pants to cover your skin
Steel-toed boots for your feet
Alert: Never skip your protective equipment. It only takes one accident to cause a serious injury.
Roof work means you spend time high above the ground. Falls are the leading cause of fatal injuries in construction. They account for almost 25% of all deaths. Slippery surfaces, steep slopes, and loose materials make roofs risky.
You can lower your risk by following these steps:
Use a safety harness and secure it to a strong anchor point.
Set up guardrails or safety nets if possible.
Keep your work area clean and free of debris.
Wear non-slip shoes to help you keep your balance.
Never work alone. Always have someone nearby in case you need help.
Many contractors face the same dangers when installing roof insulation. Construction companies paid nearly $118 million in penalties for safety violations last year. Workers' compensation claims cost $11.4 billion. These numbers show how important it is to take safety seriously.
Safety Step | Why It Matters |
|---|---|
Harness and anchor | Stops falls from the roof |
Guardrails/nets | Adds extra protection |
Clean workspace | Prevents slips and trips |
Non-slip shoes | Improves grip on surfaces |
Buddy system | Gets help fast in emergencies |
Tip: Plan your safety before you start. Most workers feel safer and work better when there's a clear safety plan.
Insulation boards can be heavy and awkward. You need to lift and move them safely. Always bend your knees and keep your back straight when you pick up boards. Ask for help if a board feels too heavy.
Some insulation types can harm your health. Fiberglass and spray foam can irritate your skin and lungs. Urea-formaldehyde foam gives off gases that can make you cough or itch. Asbestos is very dangerous and should only be handled by professionals.
Here are some simple rules for handling materials:
Wear gloves and a mask when cutting or moving insulation.
Wash your hands and face after you finish.
Keep your work area well-ventilated.
Store materials in a dry, safe place.
Dispose of scraps and dust properly.
Note: Good habits keep you safe and make your project go smoother. Take your time and watch out for hazards.
You now know how a properly insulated roof can make a big difference. When you measure, cut, and seal each board, you help your home stay warm in winter and cool in summer. Studies show you can cut energy use by up to 45%. Always check your prep, install boards tight, and use safety gear. If you feel unsure, ask a pro for help. You can do this—your home will thank you!
You want at least 2 inches for most homes. Colder places need 4 inches or more. Check your local building code for the best thickness. Thicker boards mean better energy savings.
Yes, you can. Just make sure the old insulation stays dry and in good shape. Remove any wet or moldy material first. You want a clean, solid base.
Most roofs need a vapor barrier. It keeps moisture out of your insulation. Some boards come with a built-in barrier. If yours does not, add one before you start.
You need a tape measure, utility knife, straightedge, drill, caulk gun, and safety gear. Here's a quick list:
Tape measure
Utility knife
Drill
Caulk gun
Safety glasses
Gloves
Check for soffit and ridge vents. You should see airflow from the bottom to the top of your attic. If your attic feels stuffy or damp, you may need more vents.
Try not to walk on them. They can crack or lose shape. If you must step on them, use a wide board to spread your weight. Always move carefully.
Most DIYers finish in one or two days. The time depends on your roof size and how many layers you add. Plan for extra time if you need repairs.
Tip: Take breaks and check your work as you go. Rushing can lead to mistakes.


